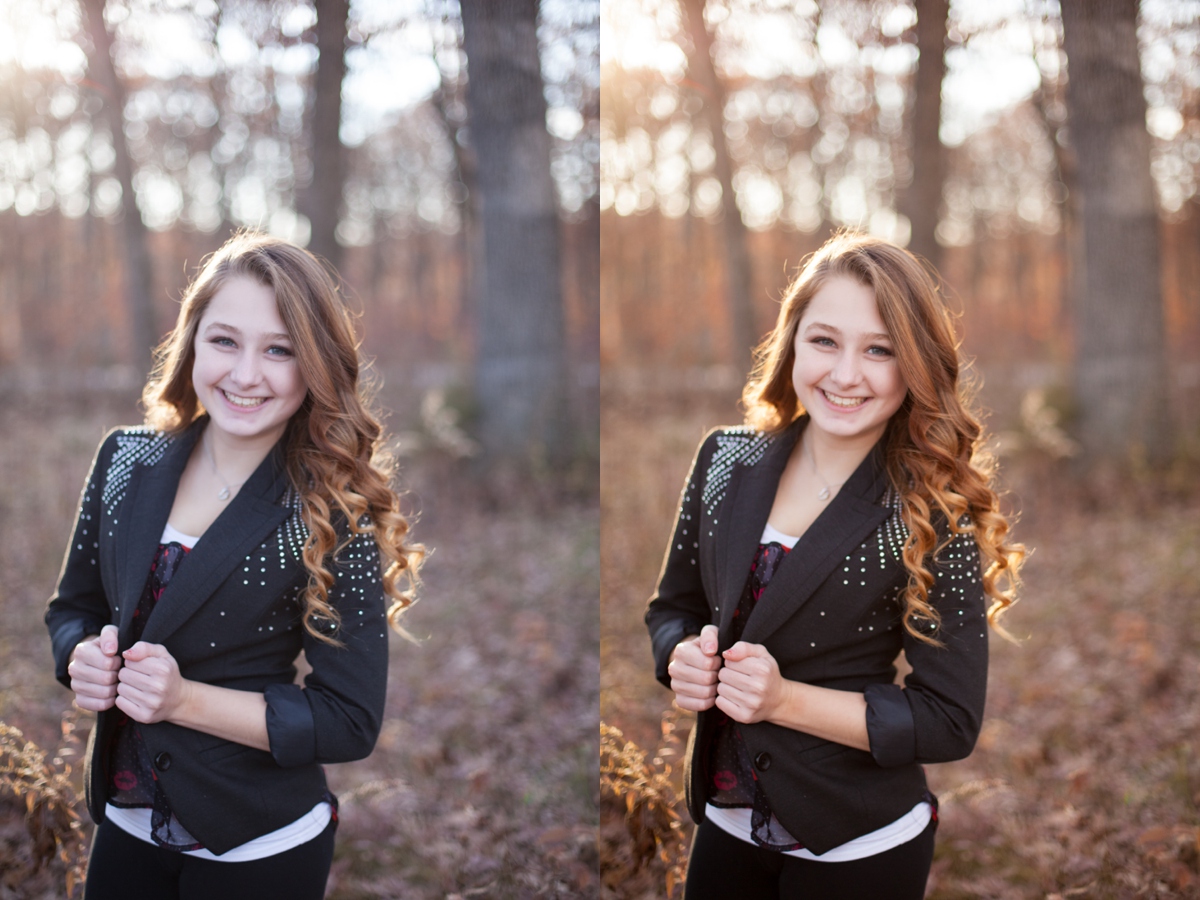
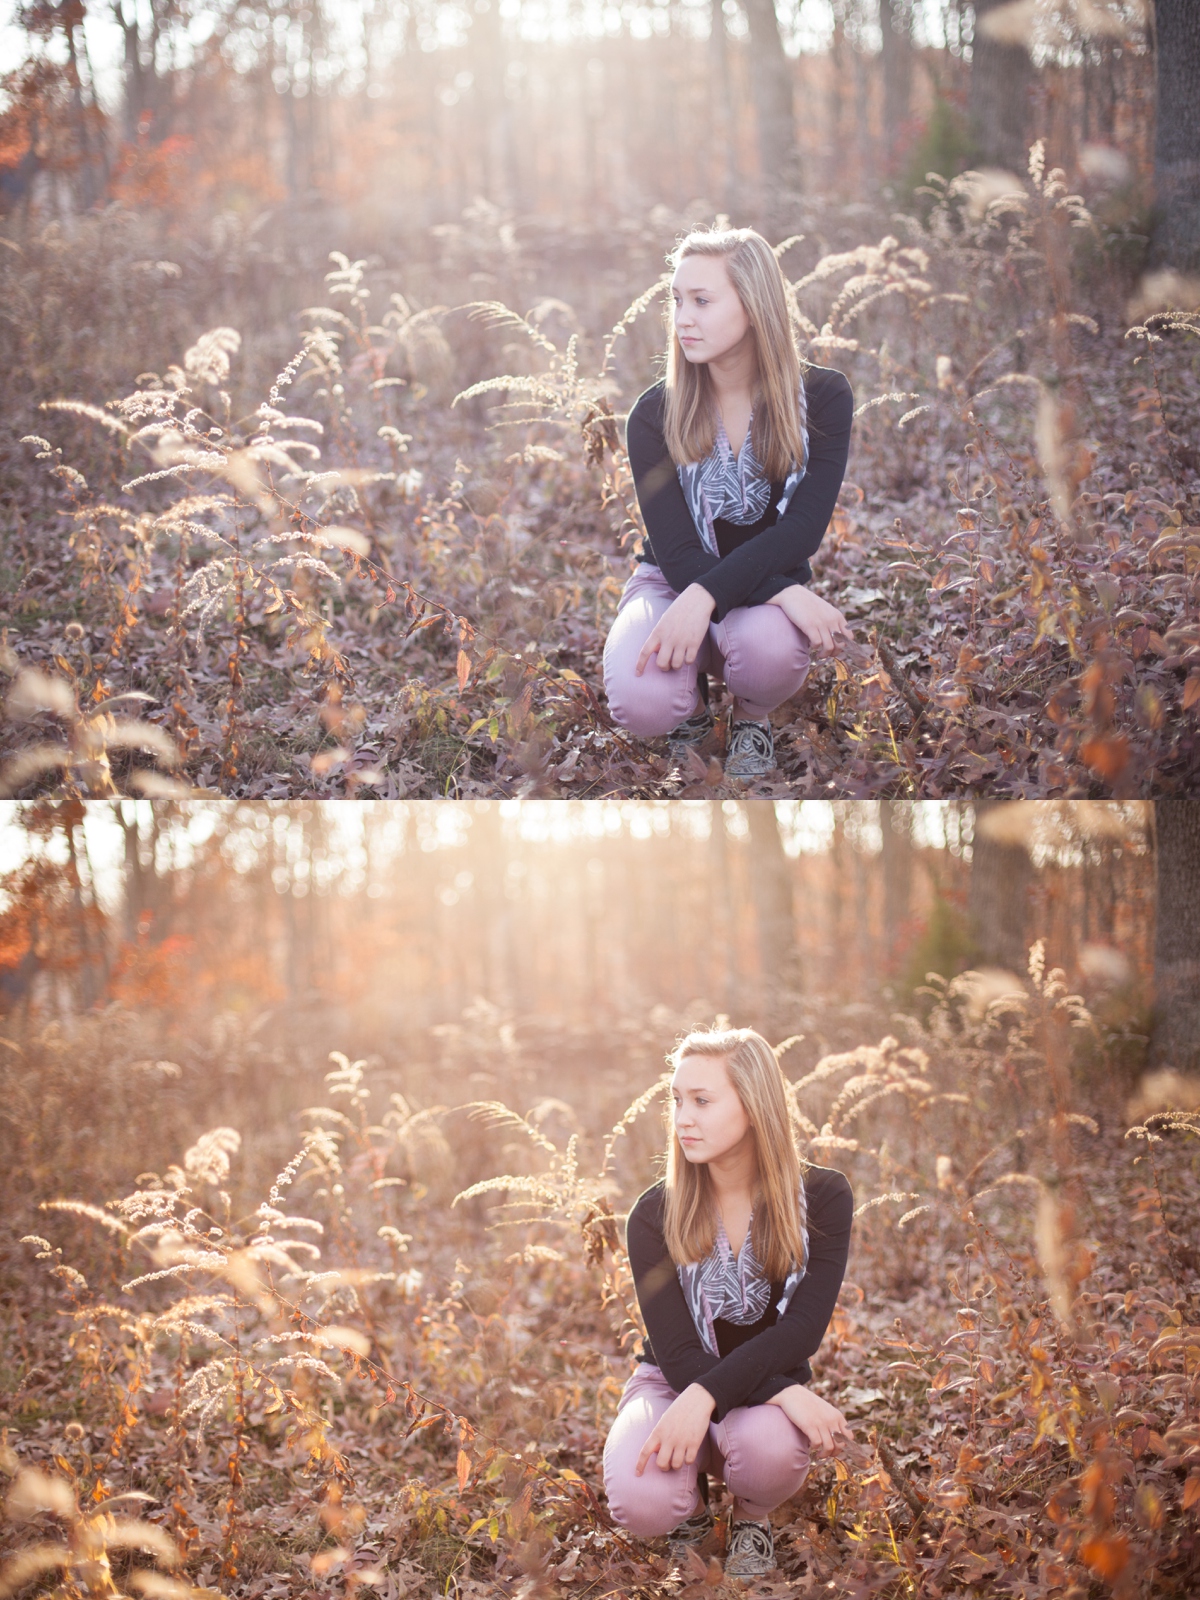
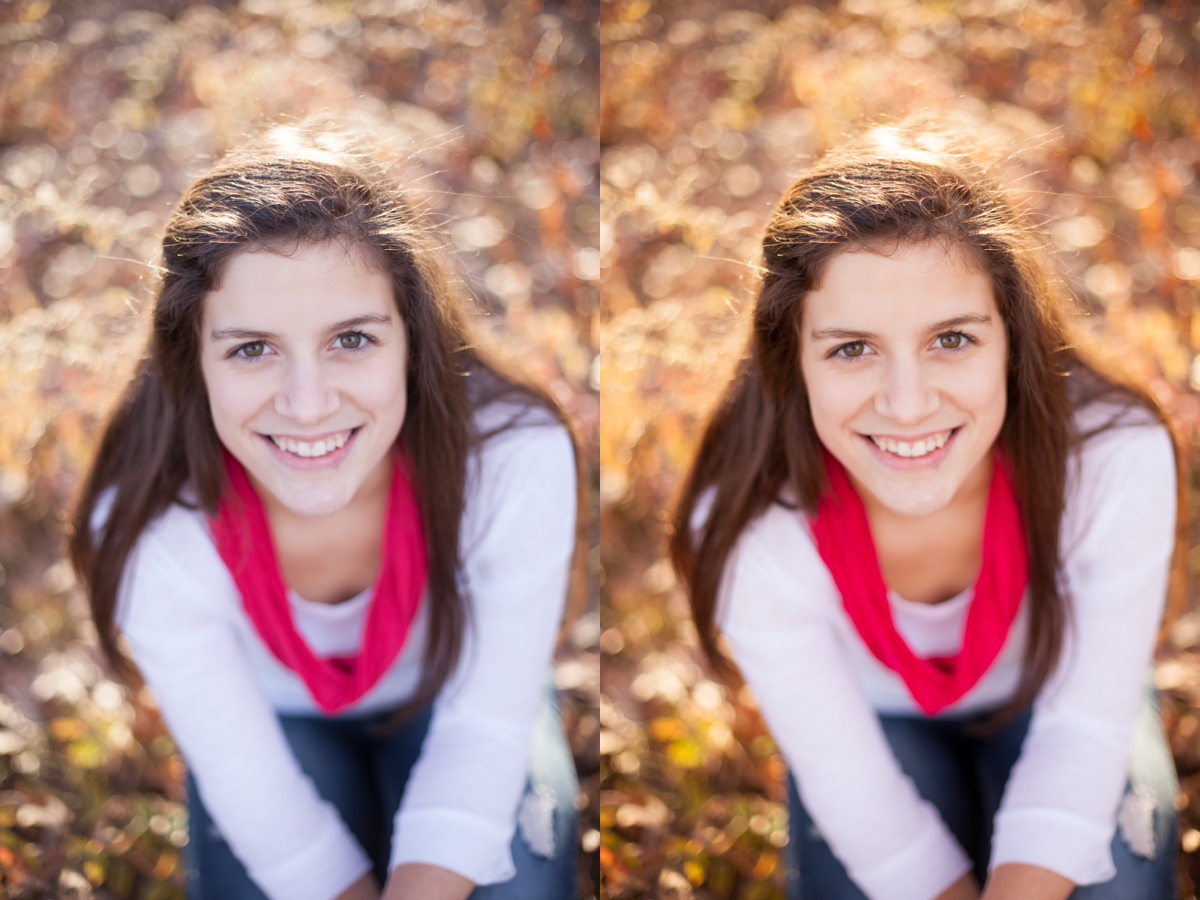
 Not going to lie my friends, it’s a bit nerve-wracking to throw SOOC camera shots out there for the whole world to see! But I’m hoping this post accomplishes a couple things:
1) Erases the lie of perfection. Photography is an art, and even the biggest photographer in the industry doesn’t give their clients straight out of camera images. Why? Because you have to perfect your art. This is part of what sets you apart in your work and creates the beautiful finished product that you present your clients. Nobody’s work is perfect! Don’t forget that… yours doesn’t have to be either.
2) Encourages and motivates someone. I’ve been shooting for a few years now, and I’m just recently beginning to nail down my editing style and streamline my workflow. It’s a long process to create consistency in your style and brand not only in your packaging and logo, but in your images as well. I’m finally coming to a point where I know what I want my work to portray and can confidently shoot in a way that defines my photography, not someone else’s. And I want that to be the same for you!
3) Gives you a better understanding of photography. I didn’t go to school for photography. I haven’t taken classes or read books or trained underneath someone. While all those resources are incredible ways to learn, sometimes that’s not always a possibility when you are still in high school. On the flip side, I have read hundreds of articles, blog posts, and forums about photography — trying my best to soak up every bit of information I could find. These kind of posts are what started my business, and it’s my hope that maybe I can encourage and challenge someone else as well. Pass on the love, y’all! While I absolutely don’t know everything, I do know that photography is an art that you have to constantly grow, and we can all learn from and bounce ideas off of each other!
All that being said, here is how it goes down at my desk after a session. I primarily use Lightroom 4 for editing… rarely do I pull out my friend Photoshop CS6, but when I do, boy does it come in handy! Before I had LR, I used photoshop primarily… and I don’t know how I did it. Talk about hours of editing! Lightroom is so much quicker & easier to use!
Once I cull my images in Lightroom, I adjust one image to what I want my finish product to look like and sync the rest of the images with those settings.
I pushed my Temperature up to 6000 / Exposure to + 0.05 / Blacks to -23 / Vibrance to +27.
And there you have it! Once I sync my images, I go through each image and change up little things here and there… adjust exposure to make things consistent depending on what my settings were during that part of the shoot, if the sun started going down more, etc.
For all of these images my settings were the following: 1/1000 sec, f/1.8, ISO 400.
So! Let me know if you guys have any questions or if this was even helpful. Have a happy Monday!


Thank you so much for taking the time to write this out, Jessica! It’s always helpful to learn how other do what they do. And thanks for being real (including sharing your sooc images… which look great on their own, btw)! ;-)
Good tutorial, especially for newer photographers. :) Love the photos. Keep it up!
So helpful! I’m wanting to get started in photography, hopefully one day for a business, and I don’t know the first thing about editing. :/ Thanks for helping me out!!